Categories
Lunch & Dinner

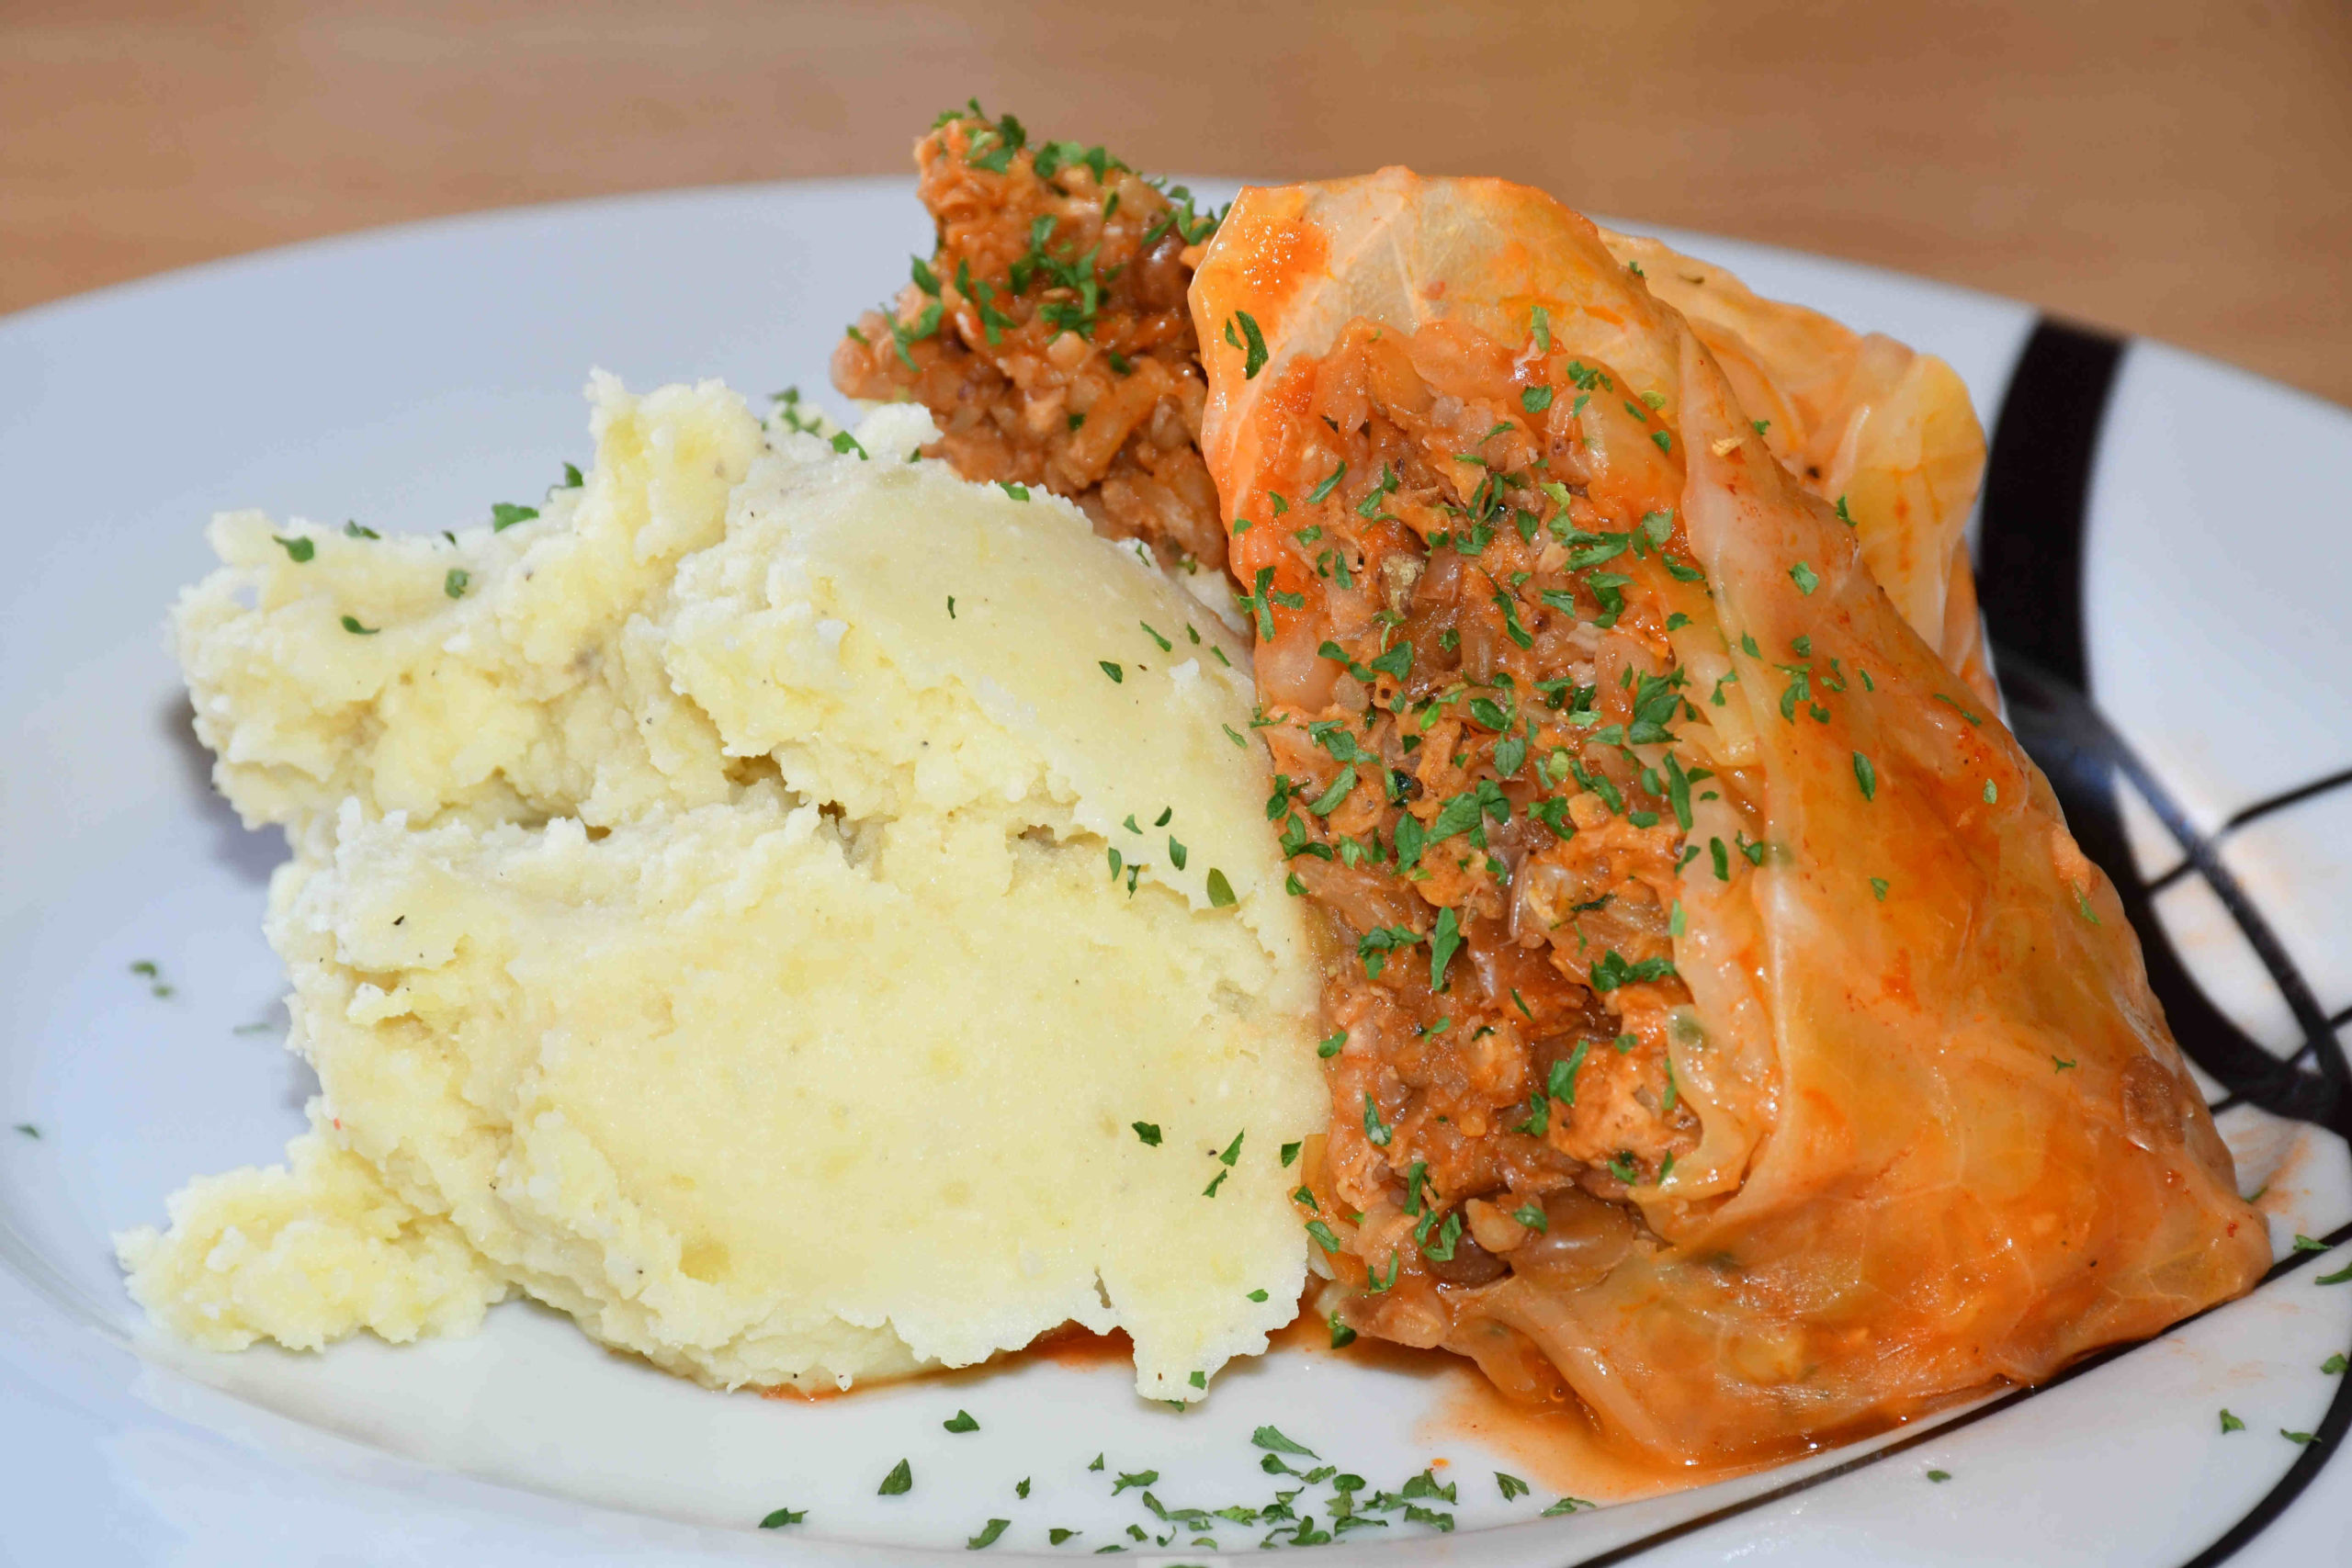
Sauerkraut Rolls

Hi Everyone, it’s nice to have you back!

Today I am showing you how to make a famous Balkan recipe, known as the Sauerkraut roll – but in a meatless way!

It will take about an hour and a half to prepare this dish and there is some work behind it – but it’s more than worth it as you can freeze them for those busy days for a quick lunch. This is usually served with mashed potatoes.

INGREDIENTS:
– 2 medium-sized carrots
– 2 medium-sized onions
– 2 tsp of pepper
– 2x 3 tsp of salt
– 2 tsp of dried paprika
– 1 tsp of chili flakes (knock yourself out if you like it spicier)
– 3 tbsp of tomato paste
– 4 Bay leaves
– 1/2 cup of green lentils
– 1/2 cup of rice
– 1/2 cup of buckwheat
– 50g of vital gluten (gluten flour) – but you can use another binder as pea protein instead
– 1 cup of passata
– and the queen of the day 1 whole Sauerkraut!

In case you can’t find a Sour cabbage, you can always do it with bell peppers.

PREPARATION:
You can start off with washing and cooking your grains in some salt – once you bring it up to boiling lower down the heat and cook for another 10 minutes.
Now you can chop the carrots and onions into small pieces. Heat up a pan and saute them for a few minutes. Place it into a bowl – the grains should be cooked by now, so drain them and add them to the bowl and give it a good stir.
The next step is to add the following ingredients: salt, pepper, dried paprika, chili, and tomato paste and mix it all together – the final step for the filling is to add the gluten flour.
Once done, start working on your Sour cabbage by carefully pealing of the leaves – don’t worry if you break some, just give them a wash and chop them up (they will be used).
Now, cut the hard stems from the middle of the leaves (if the leaves are bigger, you can cut them into half).
It’s rolling time!! This is the tricky part: take a leaf in your hand and take some filling on the upper edge of the leaf – fold the edges and start rolling – once rolled secure them by tucking in the sides with your thumb (this is tricky and don’t expect that they will all look perfect 🙂
Take a big pot and first place all the cut Sauerkraut on the bottom, follow with the cup of passata and salt and then start placing the rolls (but it’s important to squeeze them together as much as possible, so they don’t fall apart during cooking) – top it up with water, just that you cover all the rolls!
Put a lid on top and cook on medium heat for about 45 minutes.

In case you are doing this recipe with bell peppers, cut out the stem and fill them and then put them in a pot facing up!

You are ready to serve it, Enjoy!!

Vito

For a video tutorial, check the link below:
Categories
Snacks & Sides

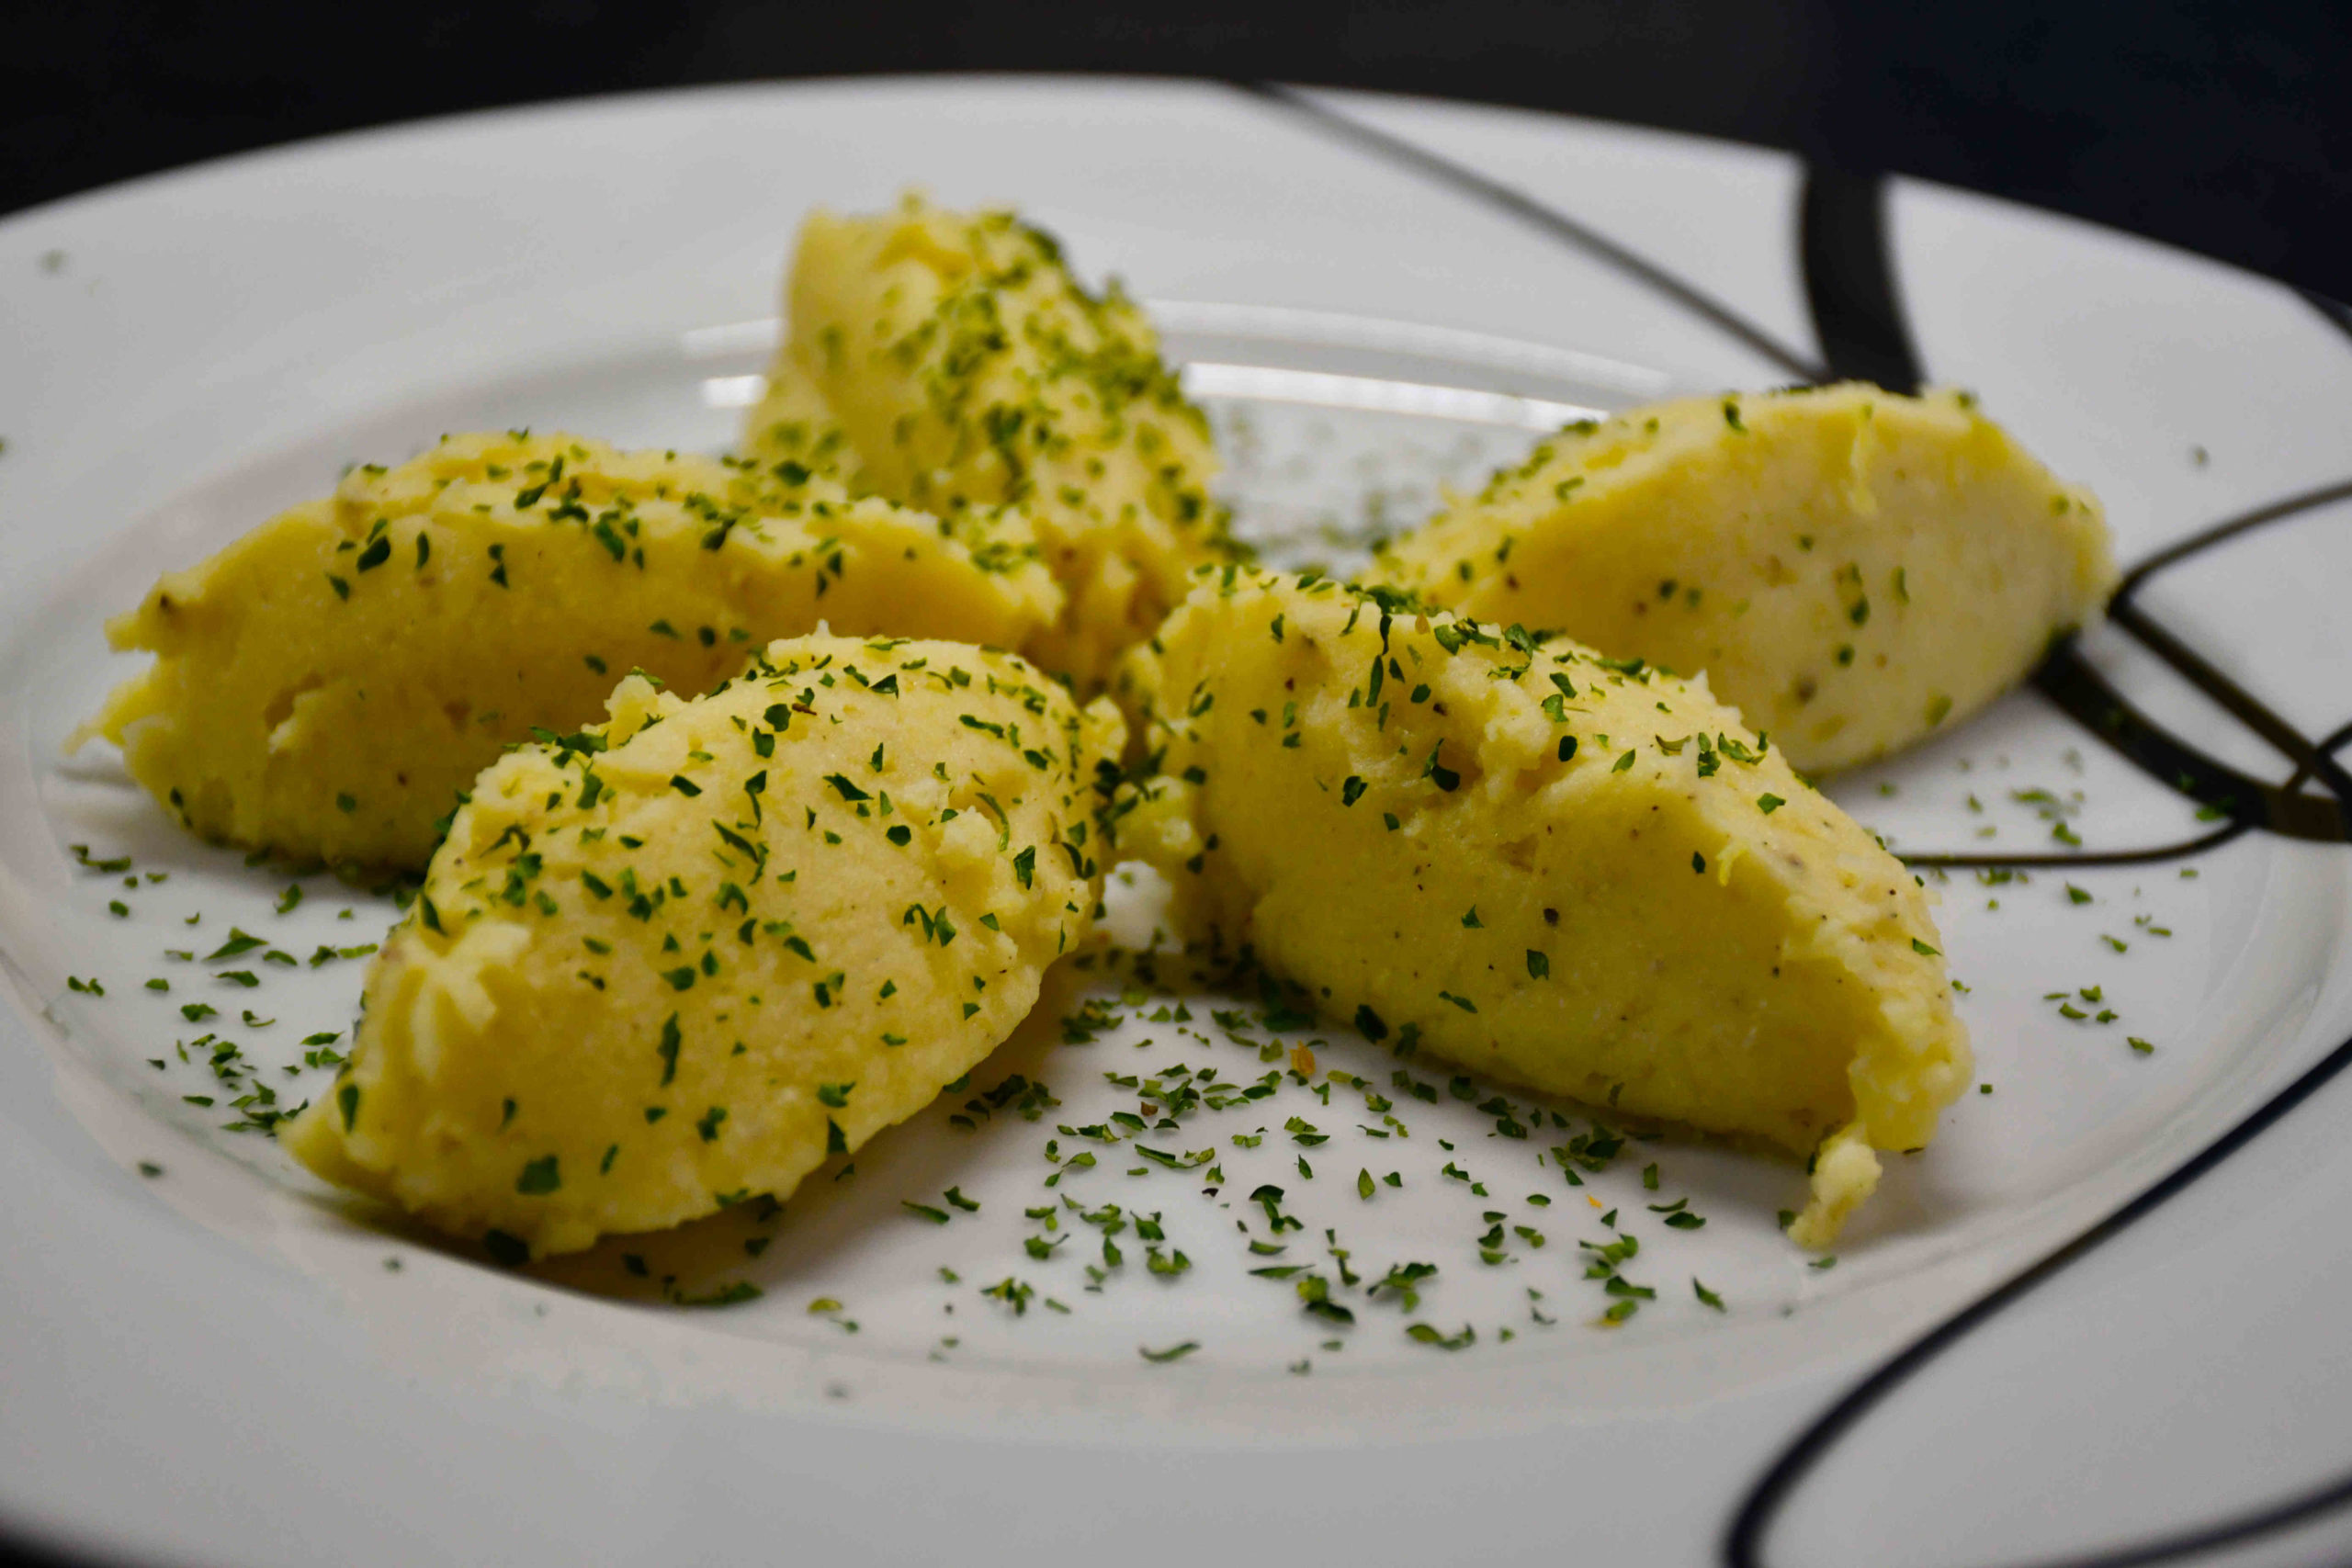
Vegan Mashed Potatoes

Who said you can’t make delicious and plant-based mashed potatoes, well they were wrong! All you need is my secret ingredient…..

This VEGAN mash potato is a real favorite even among my non-veggie friends, so don’t miss on trying this one yourself!!

INGREDIENTS:

– 5 medium-sized potatoes

– 2x 2 tsp salt

– 2 tsp pepper

– 50g cashews

– 2 tbsp coconut oil

And my secret ingredient is….. homemade CASHEW MILK!

You will also need a hand-held blender to make your cashew milk.

PREPARATION:

How to make it: Peel and cut your potatoes into cubes and top them up with cold water and add 2 tsp of salt to it. Once you bring it up to boil, lower down the heat and let it cook for 8-10 minutes (this all depends on the types of potatoes). In the meantime, soak the cashews into warm water for about 10 minutes, you will just have enough time for that while your potatoes finish with cooking. Once you drain your cooked potatoes, blend your cashews in some fresh warm water for a minute, until you get a smooth compound. Now it is time to do your last steps, add salt, pepper, coconut oil, and your cashew milk to the potatoes and start mashing (may the force be with you on this one)!!

A quick tip: if you want your mash a bit more creamy, you can always add a bit of soy milk, or make more cashew milk (it’s important that it suits your taste buds).

Thank you for reading.

Vito


For a video tutorial, check the link below:
Categories
Desserts Favourites

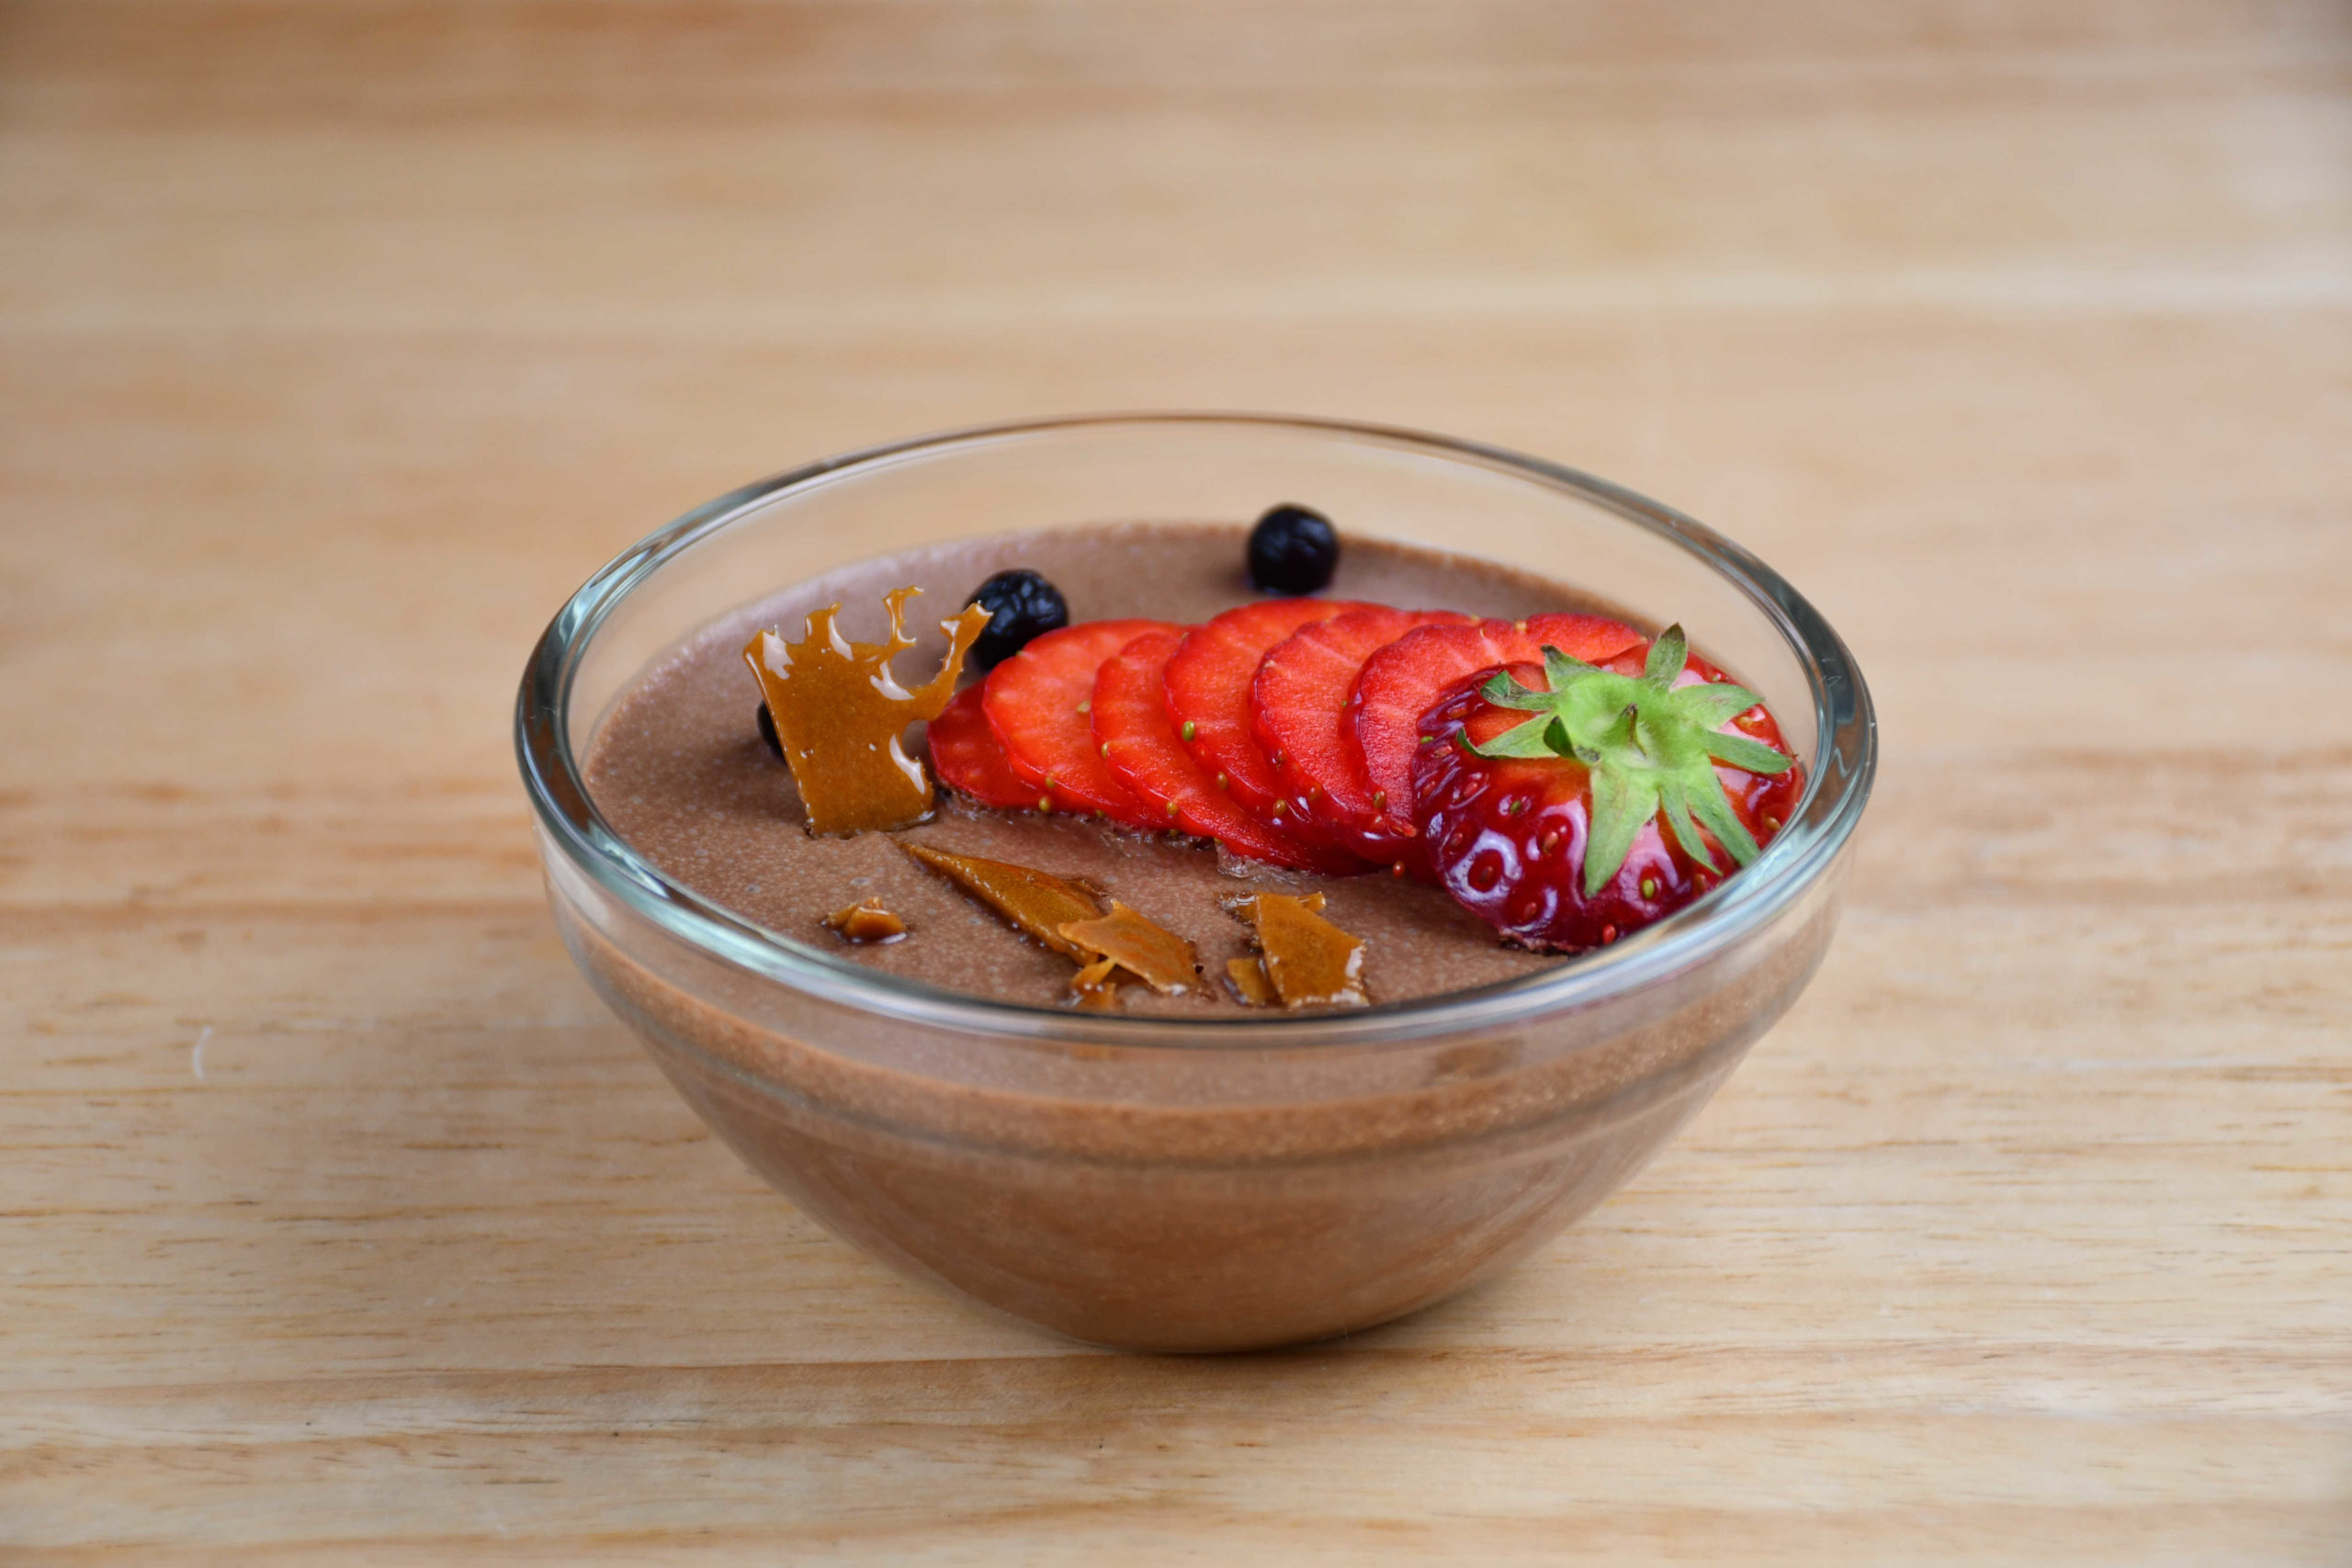
Vegan Mousse

Curious how to make an irresistible dessert? Well, you are in the right place to learn how to make a plant-based chocolate mousse!


Hi Everyone,

Today it’s time to cover up a famous recipe in a vegan way and it is Chocolate Mousse – a dessert for any occasion!

To start off, get some Aquafaba chilled in the fridge (liquid from a can of chickpeas)!

INGREDIENTS:
– 1 can of chickpeas (aquafaba) – chilled (this is a must)
– 100g of dark chocolate (should be at least 70%)
– 200ml of canned coconut milk (try to scoop out the thicker parts)
– 1 tsp of vanilla extract
– 1 tsp of strawberry extract
– 1 tbsp of agave syrup
– 3 tbsp of sugar
– 1/2 orange (zest)

PREPARATION:

To start off drain the liquid from the chickpeas (it has to be chilled!) and place it into a bowl, add the sugar, and whisk it until you get a thick ‘eggwhite’ – don’t worry, you can’t over whisk it!
Now you can melt the chocolate in a bowl on a saucepan filled with some water – medium heat on the stove.
It’s time for mixing – a lot!
Once the chocolate is melted use another bowl where you will put about 1/3 of the aquafaba and add all the chocolate to it – whisk until the chocolate nicely incorporates.
Now you can add coconut milk and keep up the good work – once you get a proper mixture add the rest of the ingredients: vanilla & strawberry extract, agave syrup, and orange zest – you know what to do now.. 🙂
Now you can start adding the rest of the aquafaba and keep mixing it.
You are probably a bit tired, but don’t give up as the only thing that is left now is to fill up the glasses with the mixture, cover it up with some cling film and let it stay in the fridge overnight (it will take at least 8 hours to get a proper texture).
Once ready you can add some fresh strawberries to it and some homemade caramel!

Enjoy!!


For a video tutorial, check the link below:
Categories
Snacks & Sides

Soybean Snack

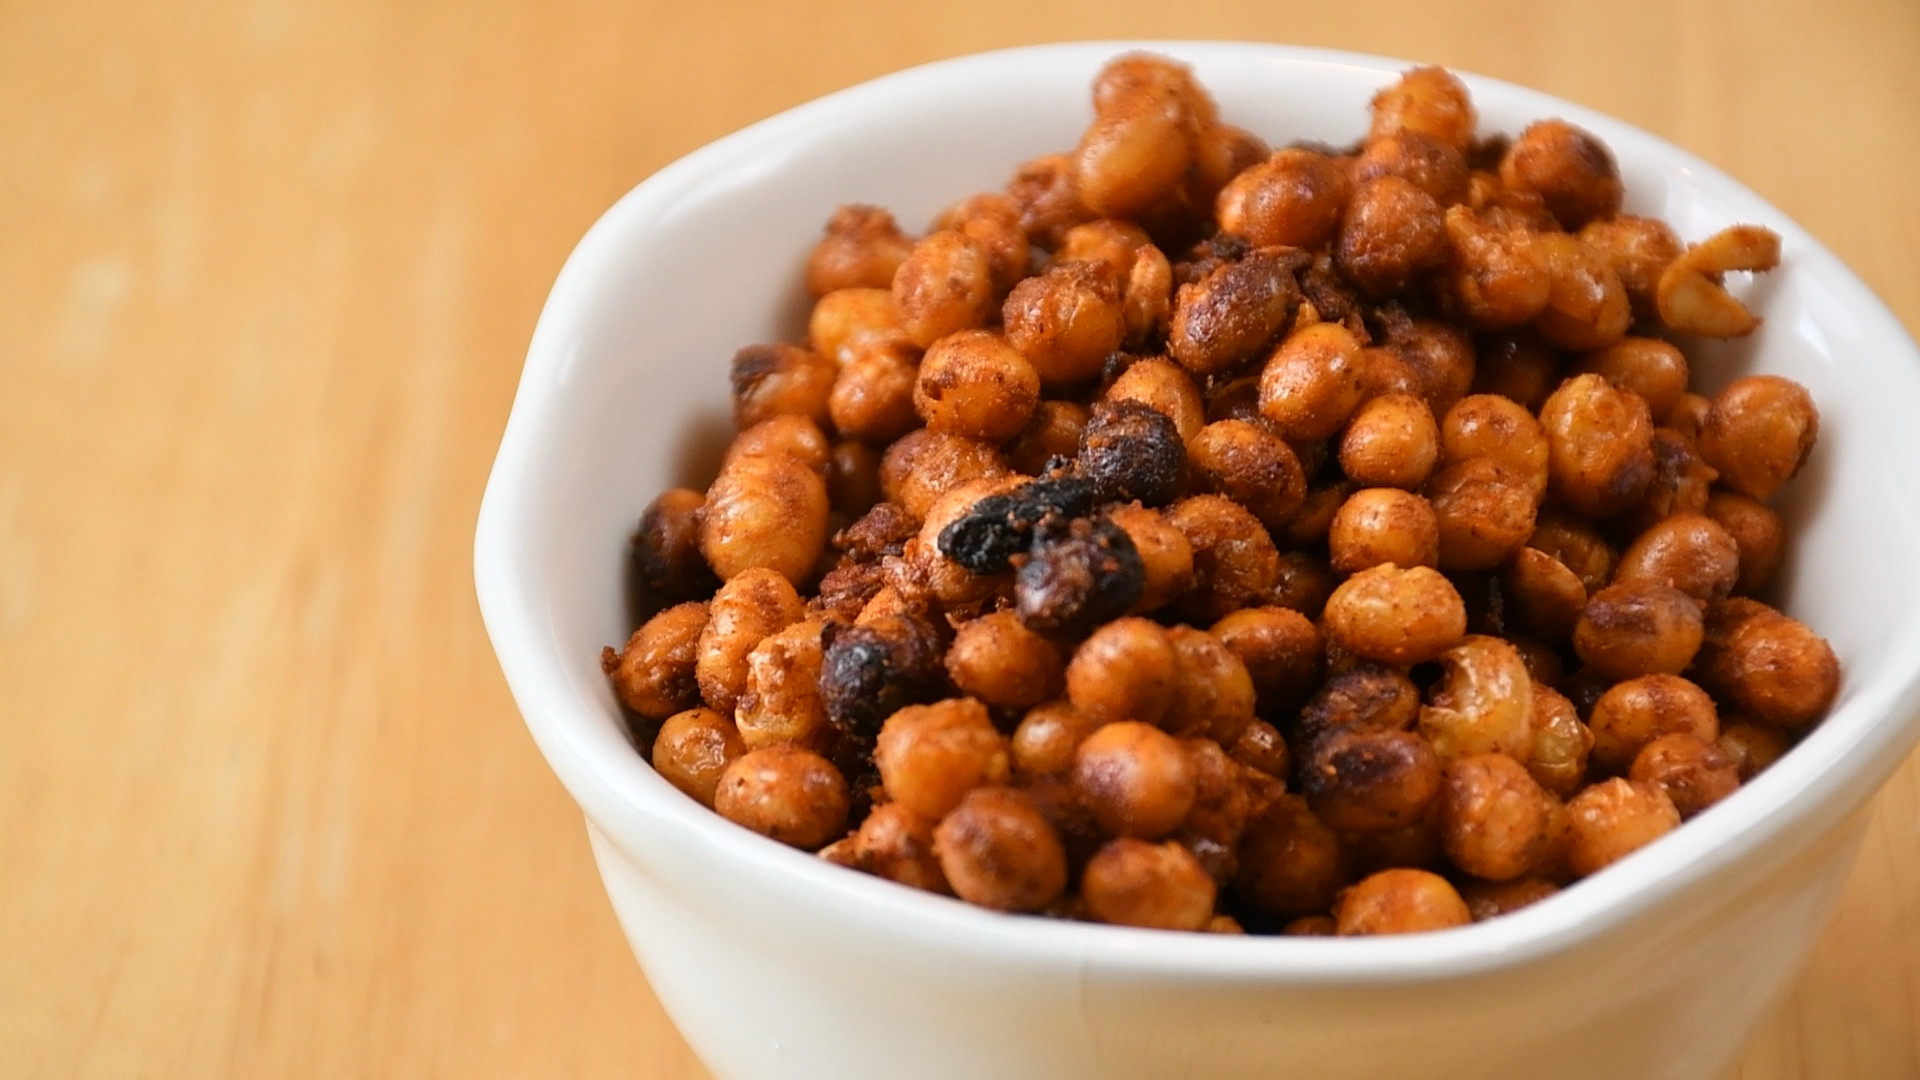
Ever wondered what to do with dried soybeans? This is the perfect occasion to find out what to make when your friends come over!!

Hello everybody,

It’s nice to have you back!

In this post, I will show you a simple yet delicious snack made out of soya beans. It will be both crunchy and spicy, sounds good right? 🙂

The preparation will start a day prior, where you will have to soak 2 cups of dried soybeans in a bowl of water. This will make them bigger, so count for some extra water in that bowl.

INGREDIENTS:

– 3 tbsp of oil (I made a mixture of sunflower and sesame for an extra punch)

– 3 tsp salt

– 2 tsp of chili (this really depends on how spicy YOU like it)

– 2 tsp of seasonal cajun and fennel mix (you can find these in almost any grocery store)

PREPARATION:

To start off the day of snacking, drain the soya beans and give them a good wash (take out the separated skins and the ‘not so good lookin’ ones’). After that, place them back in the bowl and add all the seasoning to it – give it a good mix. If you do this by hand, don’t be touching your eyes – trust me on this one!

Preheat your oven to 160°C (320°F) on the FAN option. Take some baking paper and place it on a baking tray and nicely spread all the soya beans on it. Now it’s roasting time! The baking will take around 30 minutes, but take them out every 7-8 minutes to give them a mix, so they don’t burn that quickly.

At last, once you take them out of the oven, you can give them some extra flavor with 2 tsp of dried paprika and then transfer them to some kitchen paper so it soaks out the extra oil.

Enjoy!!


For a video tutorial, check the link below:
Categories
Favourites Lunch & Dinner

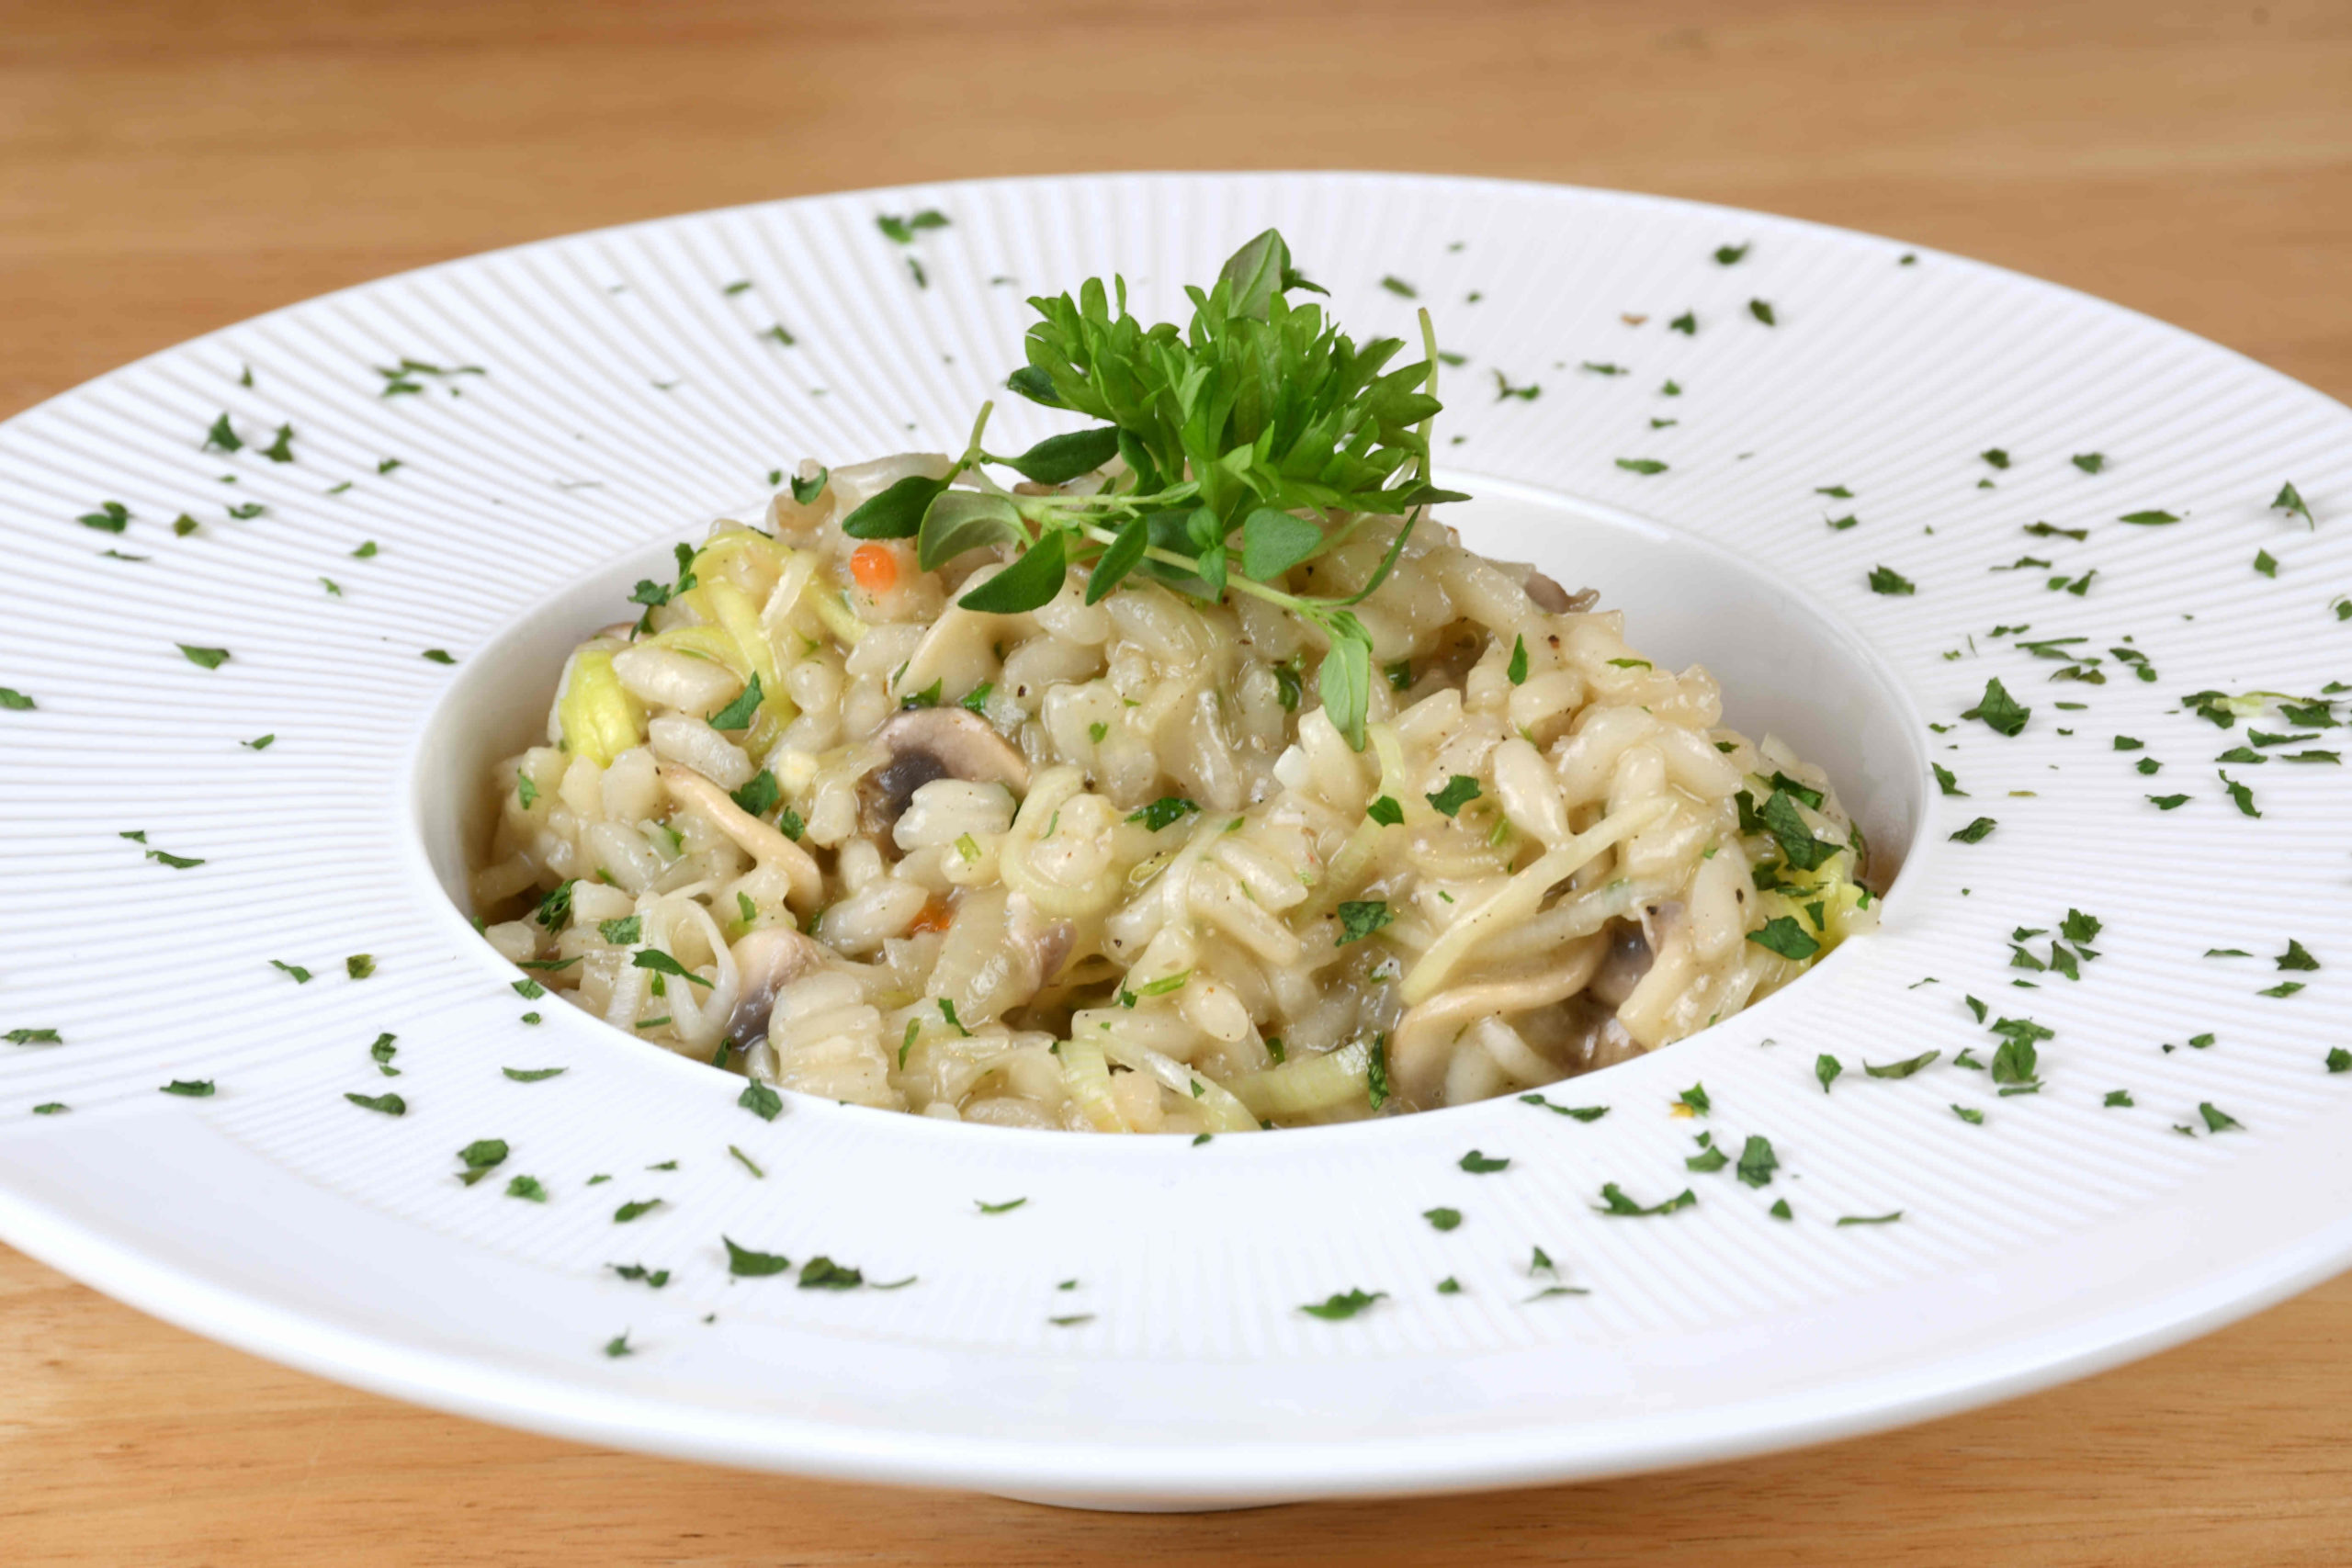
Mushroom Risotto

Do you like risotto? Try this easy mushroom and leek recipe!!! It is so creamy and delicious you will want to cook it for days!

In this post, I’ll show you how to make a perfect creamy vegan risotto. It will take about 30 minutes for this and this is more than appropriate for those romantic candlelit dinners. Besides the ingredients, every risotto requires a lot of love and attention!

INGREDIENTS:
– 1 cup of Arborio rice
– 100g of the cut leak
– 1 medium-sized onion
– 2 garlic cloves
– 250g of champignons
– a bunch of parsley
– 100ml of vegan white wine
– 1,5 tbsp of olive oil
– 1 tbsp of vegan butter
– 2 tsp of salt
– 2 tsp of pepper
– 2 vegetable stock cubes


PREPARATION:

You can start off by choppin’ the onion (fine chop), leak (just rings), mushrooms, garlic, and parsley.
Once done, boil some water and pour 1 liter into a pot and add the 2 stock cubes to it (just keep it warm on the stove).
Preheat the pan (on high heat) and saute the onions, after that, you can add rice, stir it and heat it all up for 1-2 minutes and then you can add the white wine to it – stir and let it evaporate.
Now you can lower the heat to medium and slowly start adding stock to the risotto (stir often). It should take you about 10-13 minutes until you can add the mushrooms to the story (don’t add any more stock – you should be left with about 200ml of it still in the pot). Cook the mushrooms 3 – 4 minutes and turn off the stove – now add the rest of the ingredients (you want to keep a nice fresh kick to it): leak, garlic, parsley, olive oil, butter, salt, and pepper – one last stir and you are done!!

You are ready to serve it, Enjoy!!


For a video tutorial, check the link below:
Categories
Lunch & Dinner

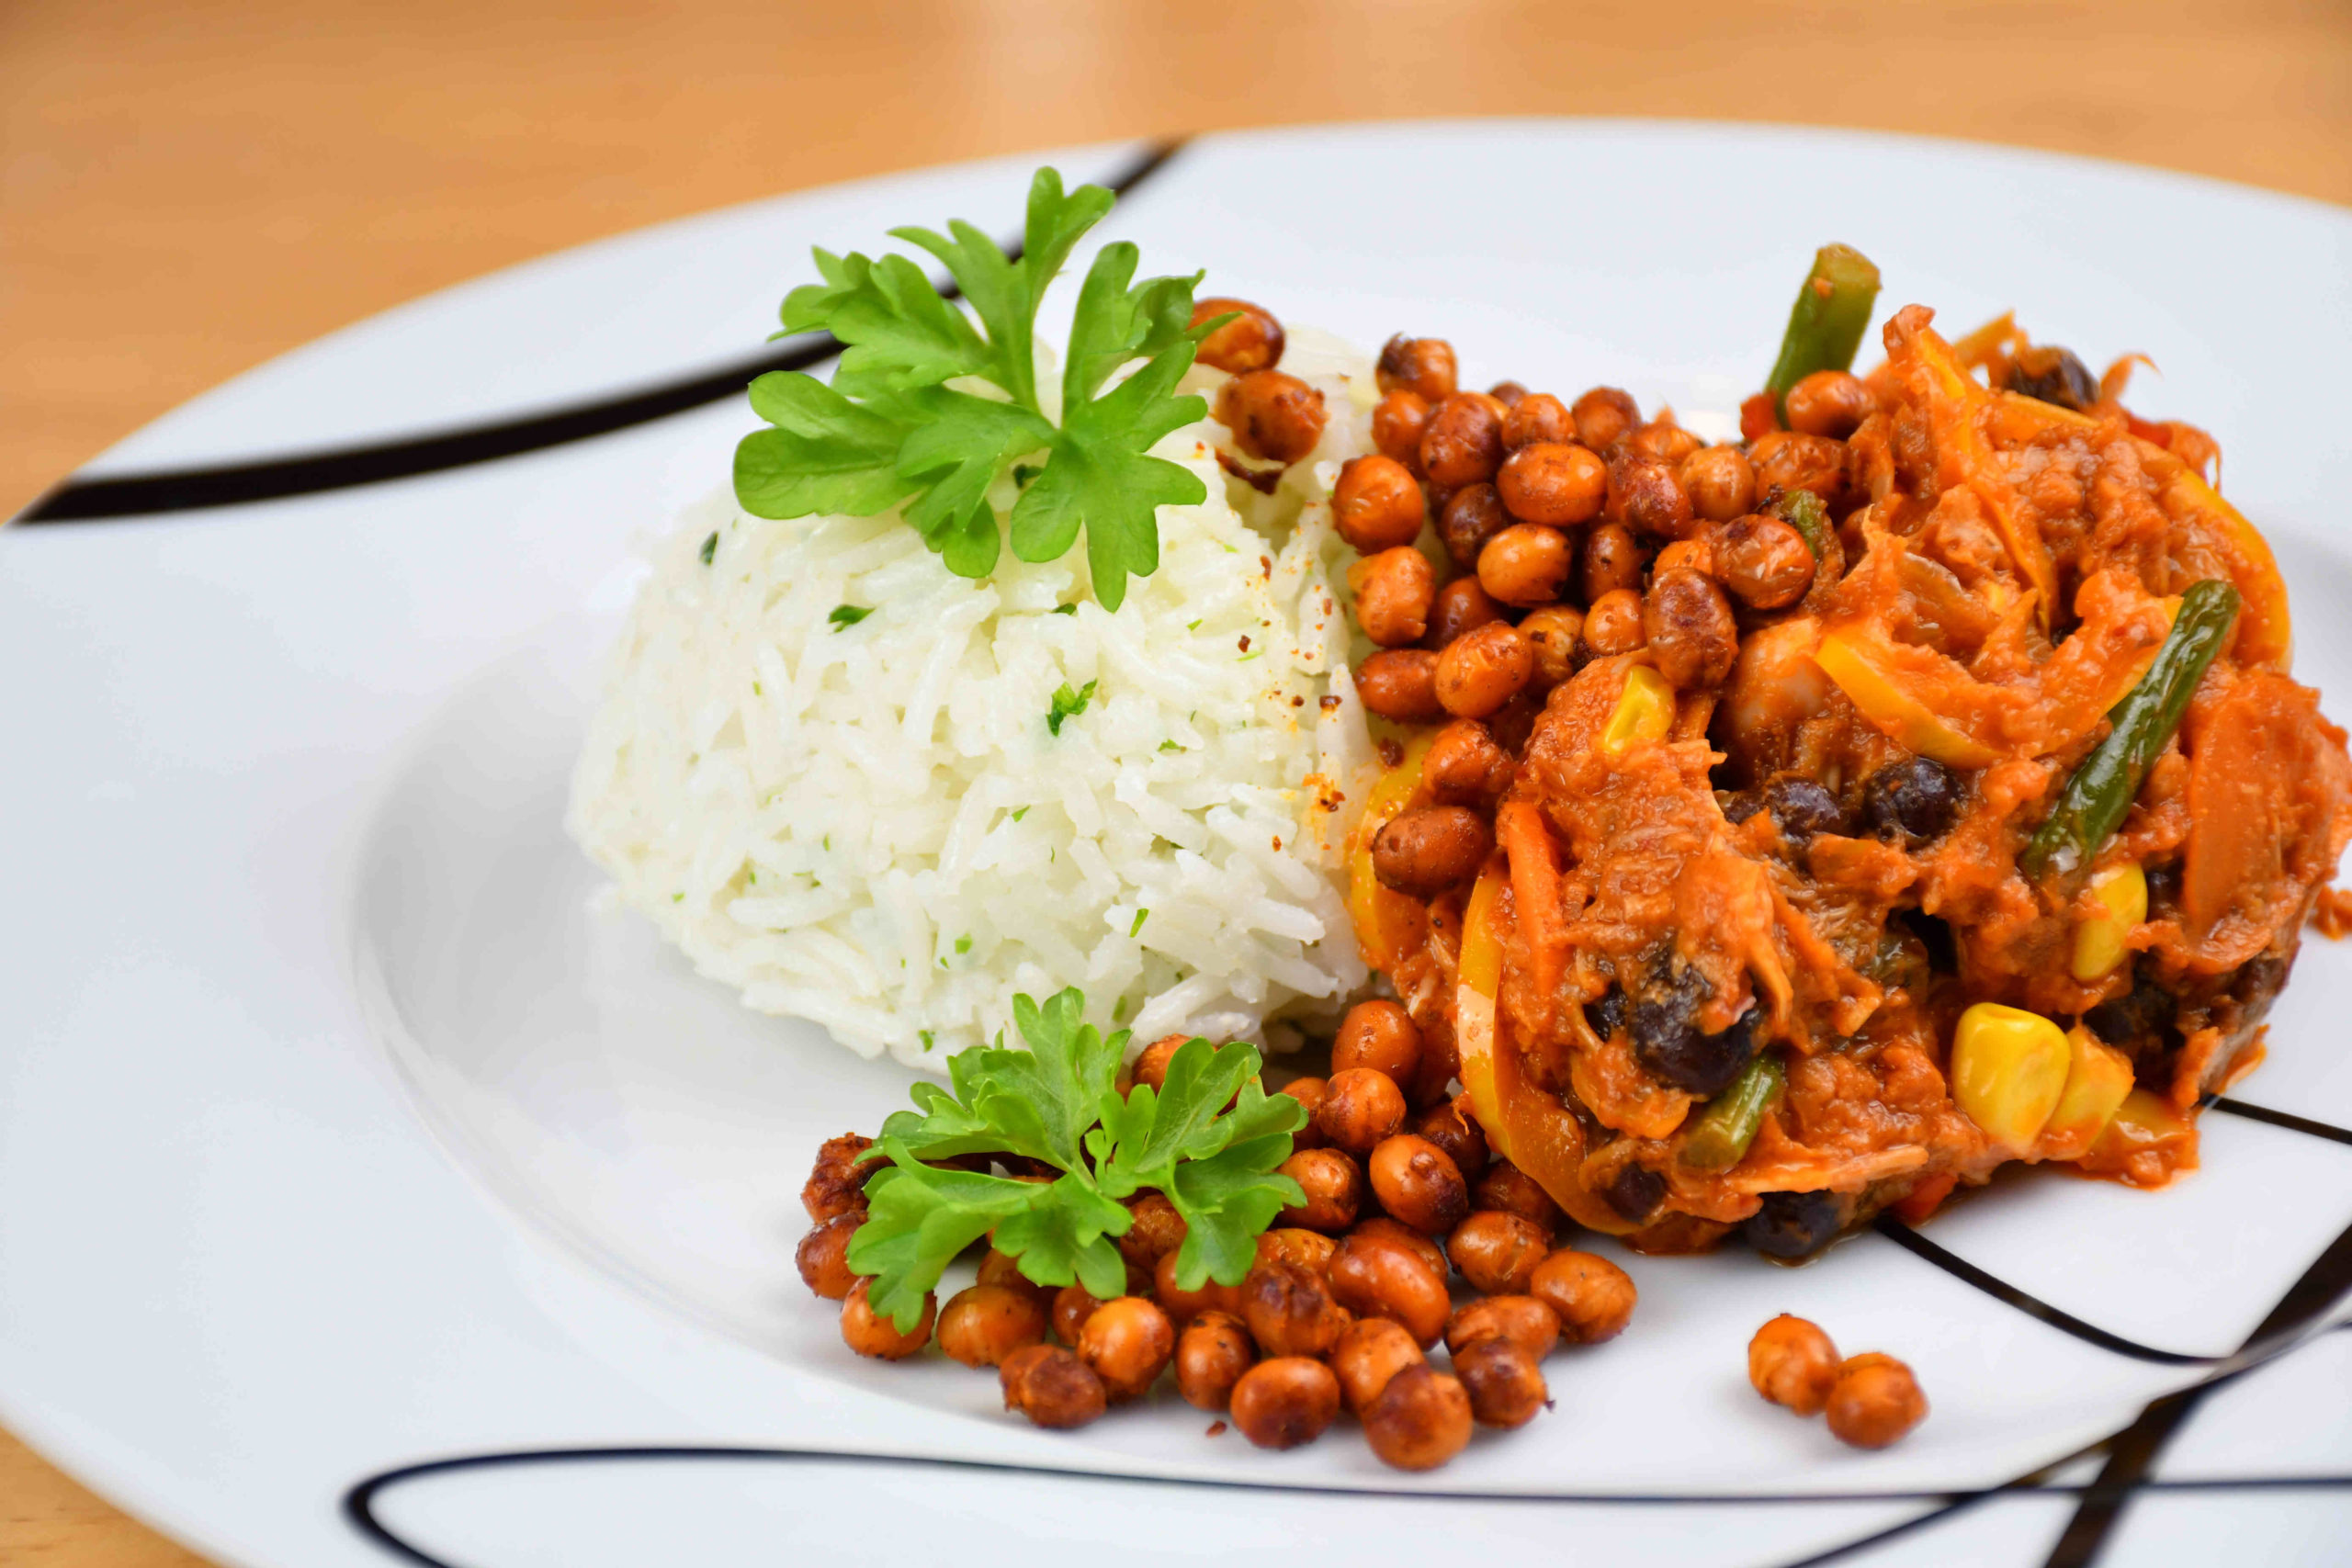
Jackfruit – Mexican Inspired

Are you wondering what to make for lunch today? Young jackfruit is a delicious option for you! Serve it with rice or make yourself a wrap!

Today we are making young jackfruit that you can find nearly in every grocery store nowadays. To prepare this it should take you around 25 – 30 minutes and should be fine for 3 – 4 people. It’s going to be Mexican inspired and served simply with some rice & roasted soybeans for crunchiness.

INGREDIENTS:
– 1 can of Young Jackfruit
– 1/2 can of Black Beans
– 1/2 small can of Sweetcorn
– 1 medium-sized Onion
– A handful of Green beans
– 1 medium-sized carrot
– 2 small sweet peppers
– Half a Lime (lime juice)
– 2 tsp of Salt
– 1 tsp of Chili (really up to you how spicy you would like it 🙂
– 1/2 tsp of Garlic Powder
– 1/2 tsp of Turmeric
– 1 tbsp of Coconut oil
– 1.5 tsp of Mustard
– 2 tsp of Liquid Smoke

Rice will require the following ingredients:
– bunch of Parsley (and I usually like a LOT)
– 1 tbsp of Vegan Butter
– 2 cups of Rice (I used Basmati this time as it is nice and quick to prepare)
– some Salt and a few drops of oil for the cooking part so the rice doesn’t stick!

PREPARATION:

Once you have gathered all these ingredients, you will start by draining the water from the can of Jackfruit and start taking the pits and hard bits out of it and putting it into a bowl.
The next step is to add all the ingredients: Salt, Chili, Garlic, Turmeric, Coconut Oil, Mustard, Lime Juice, and Liquid smoke – mix it all together, and let’s start choppin’ those veggies.
Chop the onion in nice small pieces and the rest in bigger ones. You are now ready for cooking! (You can now start cooking some rice)
Preheat the pan, and throw that onion into it. Let it fry for about 2 minutes and then add the cut vegetables and fry it for the same amount of time on high heat.
Now you can lower down the heat and add the Jackfruit mixture to it with 1/3 cup of water. Once it comes up to heat add the beans & corn and take it off the hob!

You are ready to serve it, Enjoy!!

For a video tutorial, check the link below:
Categories
Desserts Favourites

Vegan Pancakes

The best way how to make fluffy eggless/vegan pancakes with a homemade fruit compote. A great healthy breakfast idea with aquafaba.

Today we have fluffy vegan pancakes on the menu and instead of eggs, we will use a can of chickpeas (it’s the liquid called AQUAFABA that works as a great binding agent).
It will take around 25 minutes for this recipe and you should be able to make around 15 pancakes (3-4 servings)
Among the pancakes recipe, I will also show you how to make a nice mix berry compote that will accompany them 🙂

P.S. – don’t forget the maple sirup :O

INGREDIENTS:
– 1 can of chickpeas (approx. 200ml of Aquafaba)
– 200 ml soya milk
– 3 tbsp brown sugar (you can use regular as well, I just like a toffee taste to it)
– 1 lemon (for some lemon zest) and the rest for compote
– 1.5 cup of regular flour
– 1 tsp salt
– 1 tsp baking soda
– 5 tbsp sunflower oil
– vanilla extract (4 – 5 drops)

The ingredients for the compote:
– strawberries
– blueberries
– raspberries
– 3 tbsp brown sugar
– 1,5 tsp lemon juice

PREPARATION:

Our first step is to separate the liquid that we need from the chickpeas and put it in a bowl where you will mix everything together.
–> Also for those days when you just use chickpeas for something, it is safe to put the liquid in a plastic container and to freeze it for another time.
We will now add the following: soya milk, brown sugar, salt, baking soda, sunflower oil, vanilla extract, and a bit of lemon zest to the bowl.
And the next thing is to slowly start adding the flour to the bowl while mixing it.
Once you are done with this, you have 2 options: start baking the pancakes (it would be handy if you have a helping hand) or put the mix in the fridge while you are making the compote.

For the compote it will take you 10 minutes to prepare it – you will have to cut the strawberries and blueberries and add them to a saucepan together with the raspberries (leave some aside just to add them at the end for crispiness).
Put the saucepan on the stove on medium heat and give it some time to heat up.
Once heated up add the sugar and give it another few minutes so it all becomes nice and thick.
You can then take it from the stove and add the remaining fruits to it.
Squeeze out some lemon juice and add it to the compote – in case you have some leftovers this is a great preservative.

Now, it’s time to serve them and eat!

Enjoy!!


For the video tutorial, check the link below:

Categories
Favourites Lunch & Dinner

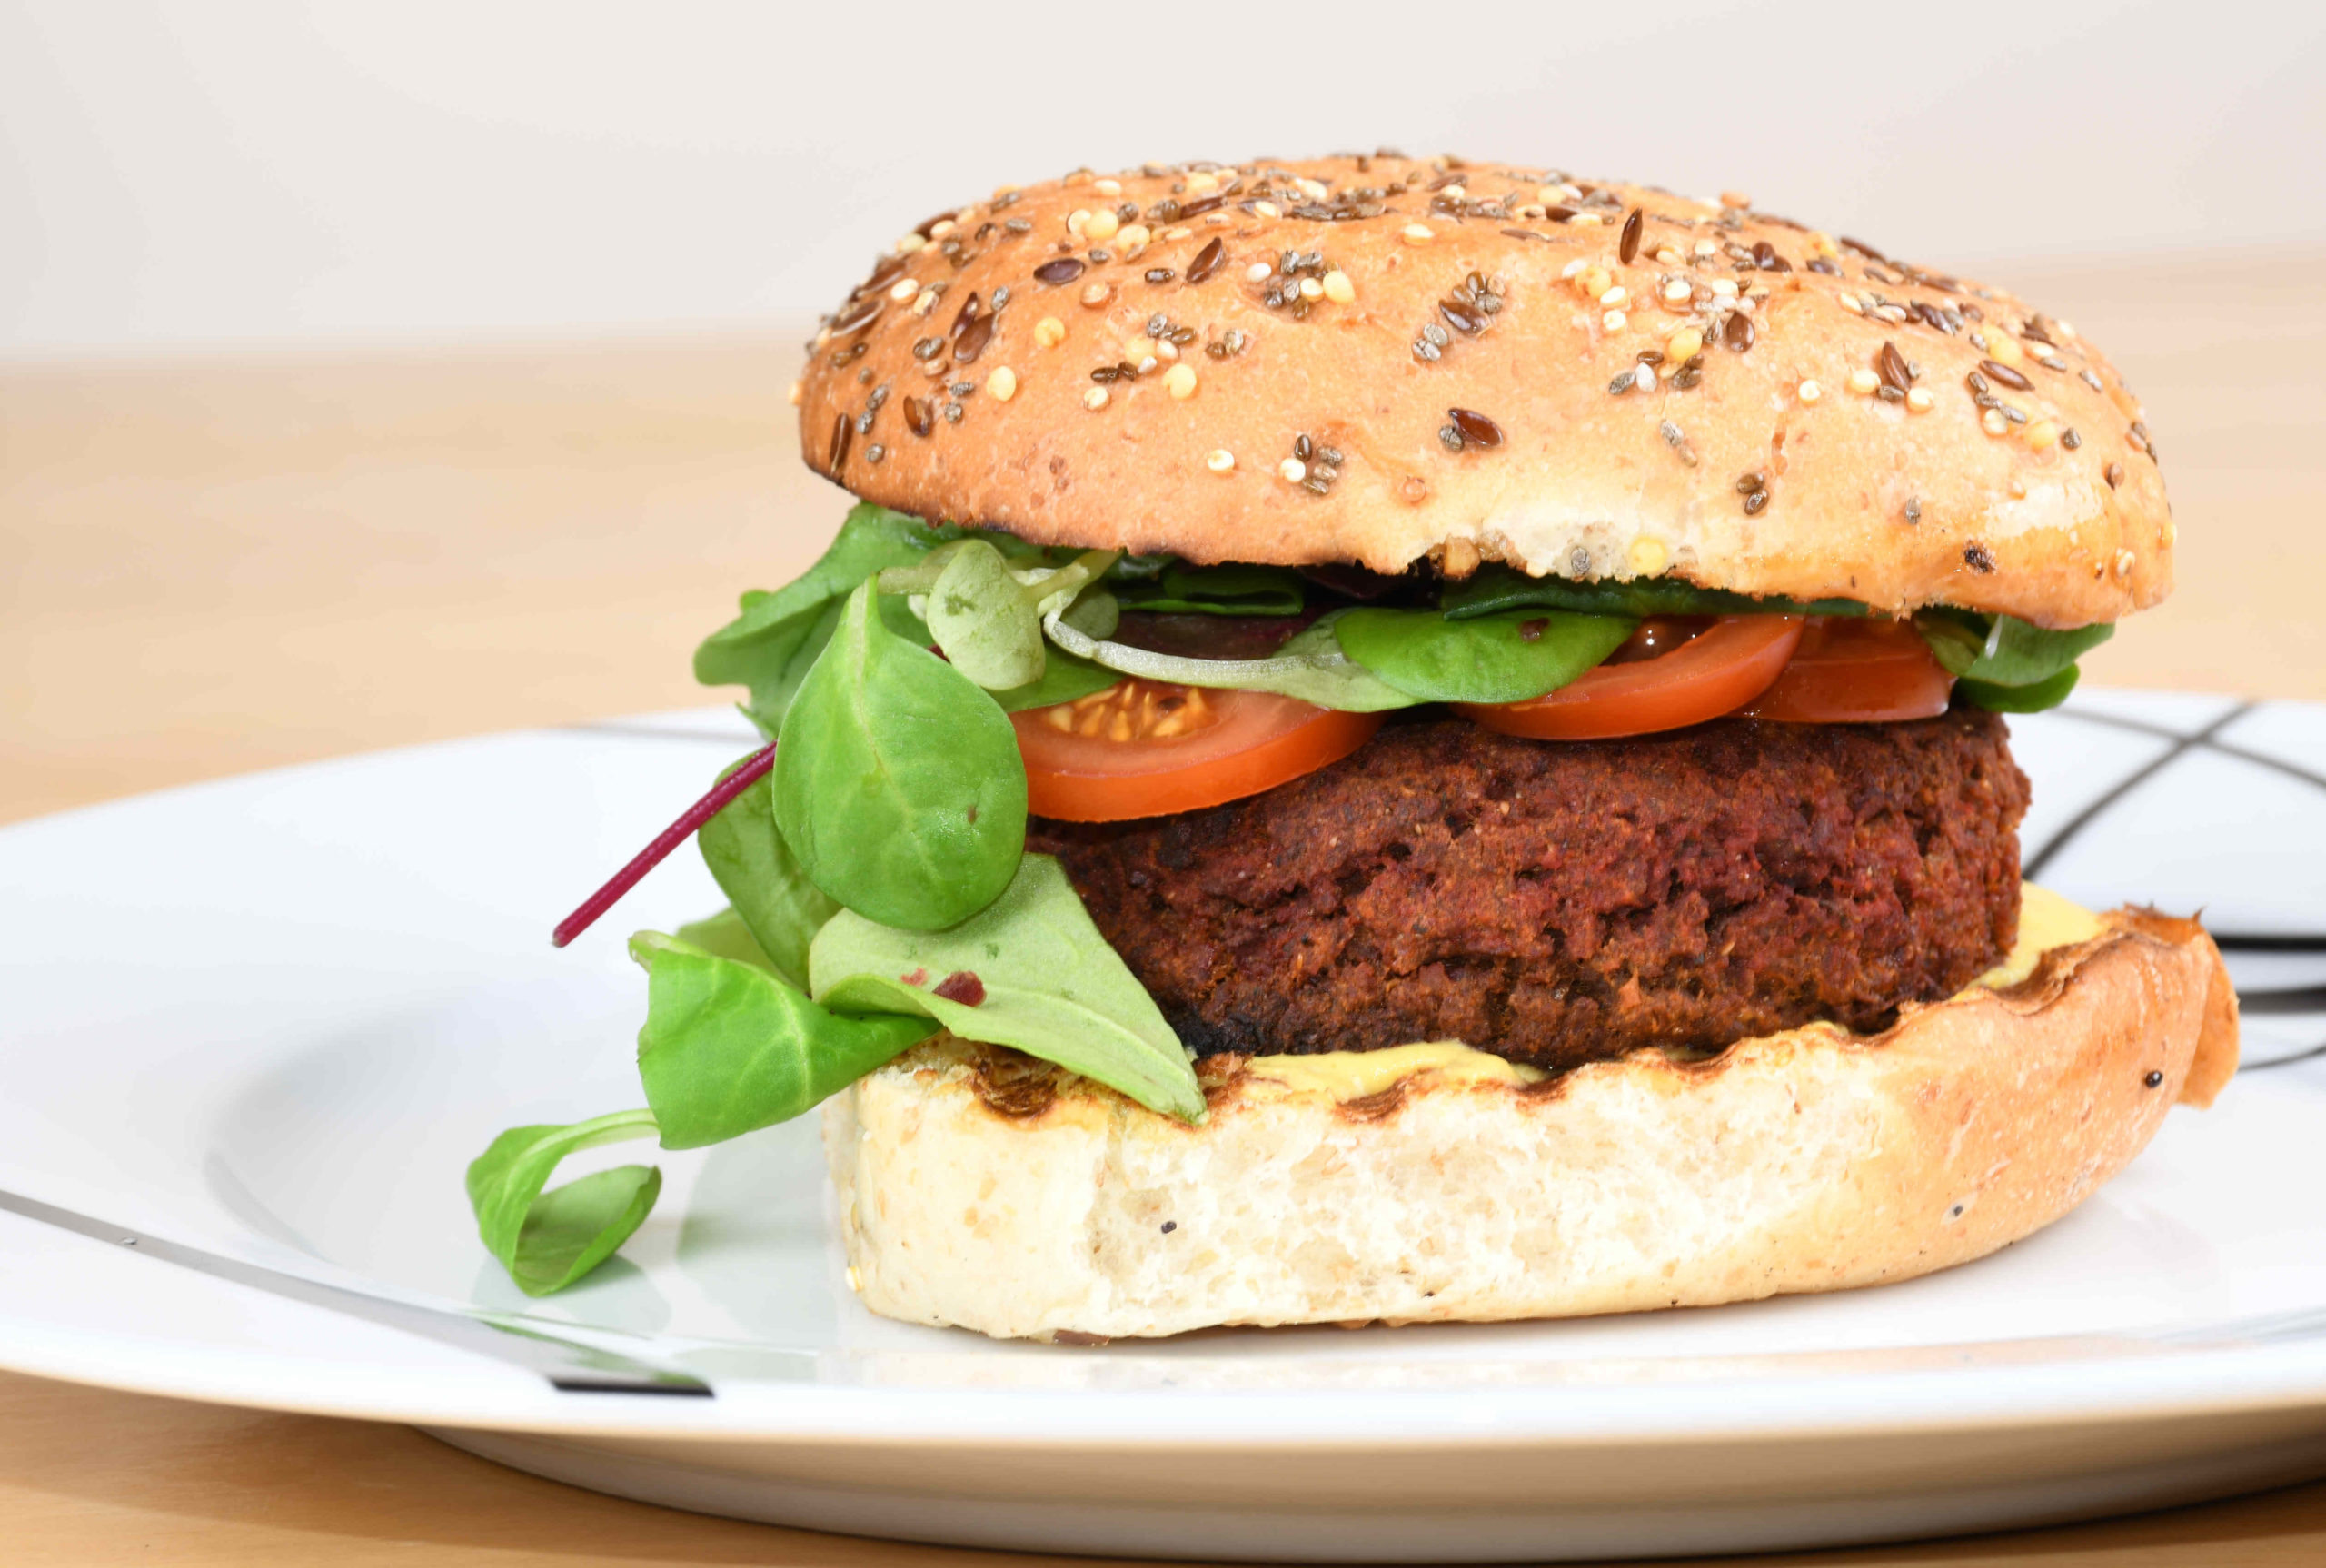
Vegan Burger

Are you vegan and craving a delicious burger? Well, you are at the right place!!! This amazing vegan burger is also gluten-free!!!

Today I am showing you a Classic, a delicious Vegan Burger that is also gluten-free! The preparation will take about 30 minutes and then it’s good to leave it in the fridge at least an hour so it gets a firmer shape. The mixture should be for 5 large or 10 smaller burgers.

INGREDIENTS:
– 2 tsp of dry paprika
– 1 tsp of turmeric
– 3 tsp of salt
– 1,5 tsp of chili flakes
– 1 tsp of pepper
– 1 tsp of garlic powder
– 2 tsp of dry thyme
– 1 tbsp of brown sugar
– 1 tbsp of coconut oil
– 6 tbsp of pea protein
– 5 tbsp of milled chia seeds
– 4 tbsp of tomato paste
– 2 tbsp of oil from sundried tomatoes (for umami flavor)
– 1 can of chickpeas
– 100g of soy mince
– 1 large cooked beetroot

PREPARATION:

Start off by cutting the beet into smaller pieces and put them in the blender. Get your chickpeas, as well as 1/2 cup of aquafaba (liquid out of the can), and add it to the blender – now blend it well!
Now you can soak the soy mince in water for about 5 – 10 minutes and then drain all the water out of it – give it all your power!!
Place the blended mixture a bowl and first add all the ingredients except soy mince, pea protein, and chia seeds – give it a good stir.
Now you can add the soy mince – give it a good stir – and add the protein and chia seeds at last and repeat the mixing.
Leave it to stay for 10 minutes just that the chia seeds and pea protein start working.
As it’s good to leave the burgers in the fridge for an hour you want to wrap up a chopping board in cling film – trust me 😉
Now for the burger mold, I have been creative and used a piece of an old plastic container – press them well.
Leave in the fridge and get them out whenever you are ready (you can freeze some of them, just put them on some baking paper).
Preheat your oven on 180°C (360°F) – place the burgers on some baking paper lightly sprayed with oil.
Cook for 20 – 30 minutes – you decide when you are happy.
The burgers won’t harden during the cooking BUT as you leave it outside the oven for a few moments they will get a nice crust!

You are ready to serve it, Enjoy!!


For a video tutorial, check the link below: